
Brotherhood of Blub [BLUB]
The BLUB WvW Handbook
Guild Wars 2 World vs. World · EU
 Gammazone, Keeper of BLUB’s WvW Lore
Guild Wars 2 • The Brotherhood of Blub [BLUB] • EU
Game mechanics checked 18 November 2026
Welcome to the BLUB WvW Handbook!
New to WvW? Confused by commander callouts? Not sure what people mean when they shout STACK, BOMB, VEIL or PUSH?
Don’t worry! We’ve got you covered. We created this handbook to help everyone understand WvW, learn the terminology and become more confident playing with the squad.
Whether you’ve been playing for 10 minutes or 10 years, there’s something here for you. Our aim is simple. We want everyone to understand what’s happening, know what to do and enjoy playing together.
BLUB is a social WvW guild. We log on for the people as much as the game, and we plan our runs around having a good time together. Our open tags usually favour PPT (points per tick and objective play) over PPK (points per kill). We take camps, escort yaks, build siege and defend what we can. Our entry requirements are fairly modest. Remembering where you left the tag is considered promising.
💙 Brotherhood of Blub
One Guild. One Community. One Brotherhood.
New to the tag? Ask questions, bring a WvW build and tell the commander what role you can cover. Watch your supply and learn the map a few objectives at a time. Nobody starts as an expert.
Your first BLUB run
BLUB note If the squad arrives together, please take a screenshot. We’ll need evidence.
- Find us. Join discord.gg/blub, say hello and ask which WvW team and map BLUB is on. Ask about the next open tag or a guild invite. You can also contact Omegazone (omegazone.9254), Gammazone (gammazone.3802) or Stumpy (mrstump.4568) in game.
- Check your team. Press B and open Matchmaking to check your current team. You need to be on the same EU WvW team to fight alongside us. See the six-tab walkthrough below. If you’ve never been assigned and the game offers a team choice, check with BLUB before choosing. If you’re already on a different team, see the matchmaking steps below.
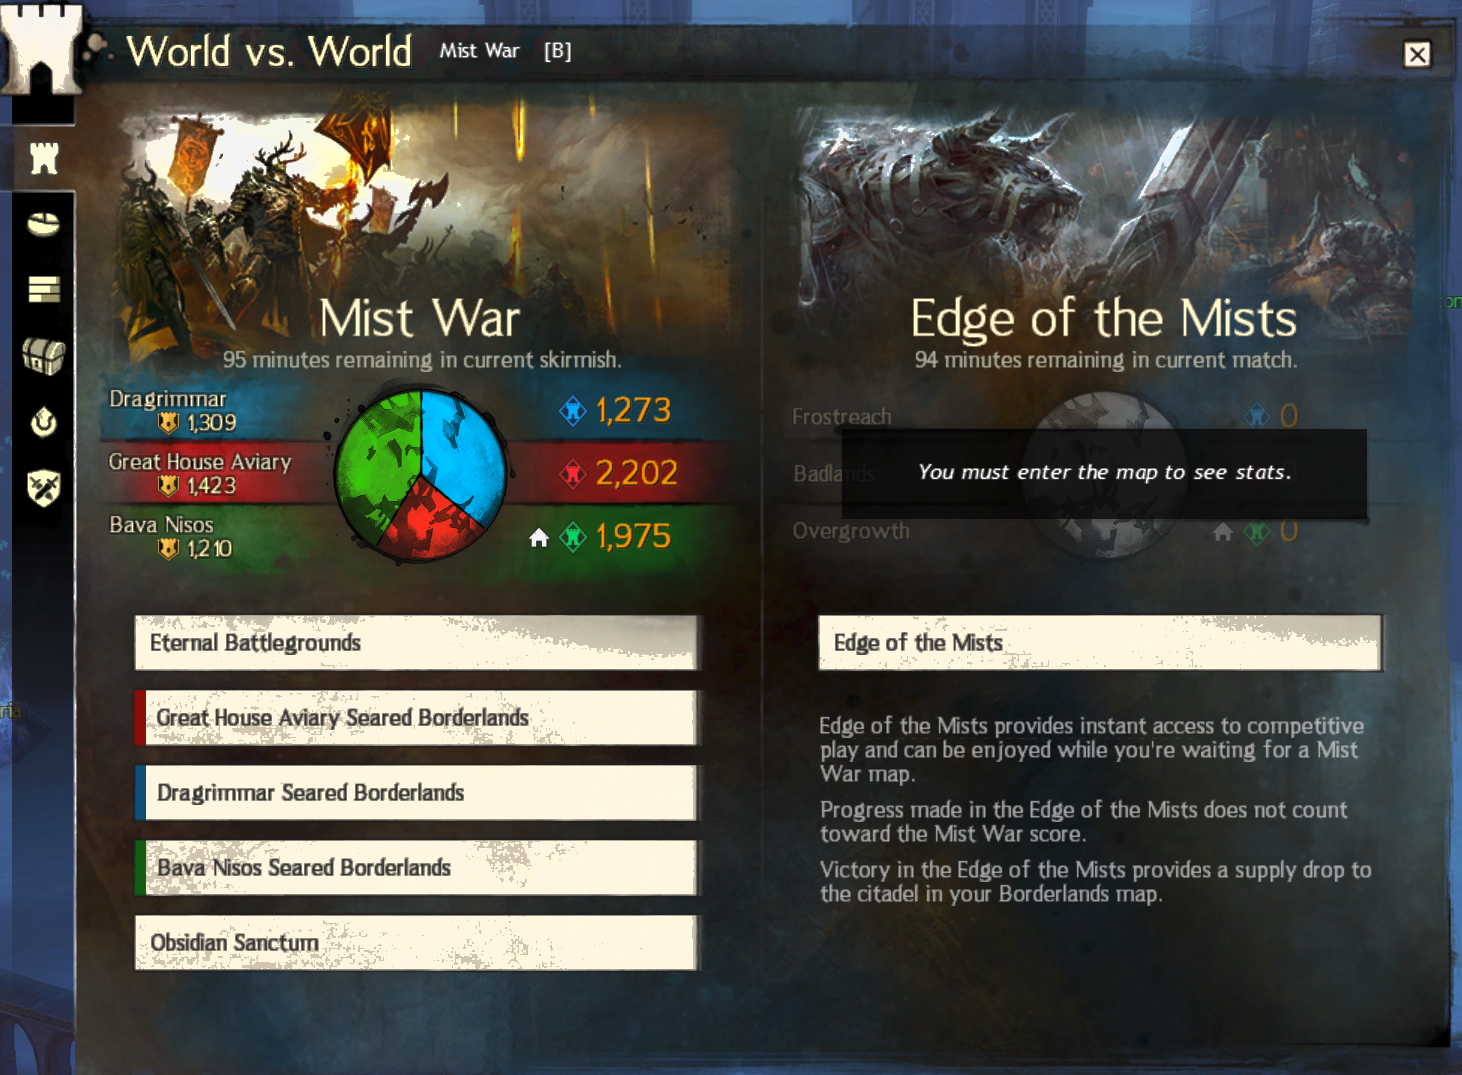
- Enter the commander’s map. In the WvW panel, open Mist War and choose the map the commander calls. If it’s full, queue and ask where people are playing while they wait. Joining a squad does not move you to its map.
- Join the squad. Click the commander tag on the map or minimap and choose Join Squad. You can also right-click a squad member’s name in chat, or type
/squadjoin Character Name. If it’s private, ask for an invite. If you can’t see other tags while in a squad, turn on Show All Commander Tags or check the squad panel before switching. - Listen and meet up. Join the voice channel the commander gives you. Listening is enough for a first run. Say “First run, where should I meet you?” in squad chat if you’re unsure. Leave any assigned subgroup changes to the commander. Grab supply at a friendly camp on the way if it’s safe.
Coming back after a break? Paid accounts unlock WvW at level 31 and free accounts at 60. WvW scales you up, but your gear and unlocked skills still matter. A level 80 character with a WvW build is the easiest starting point. No Warclaw yet? Tell the squad. Nearby mounted allies can share their movement boost with unmounted players. To use your own Warclaw in WvW, you need Path of Fire and the first point in Warclaw Mastery on that character. The Janthir Wilds PvE unlock alone won’t give you WvW mount use.
Press B: your WvW panel
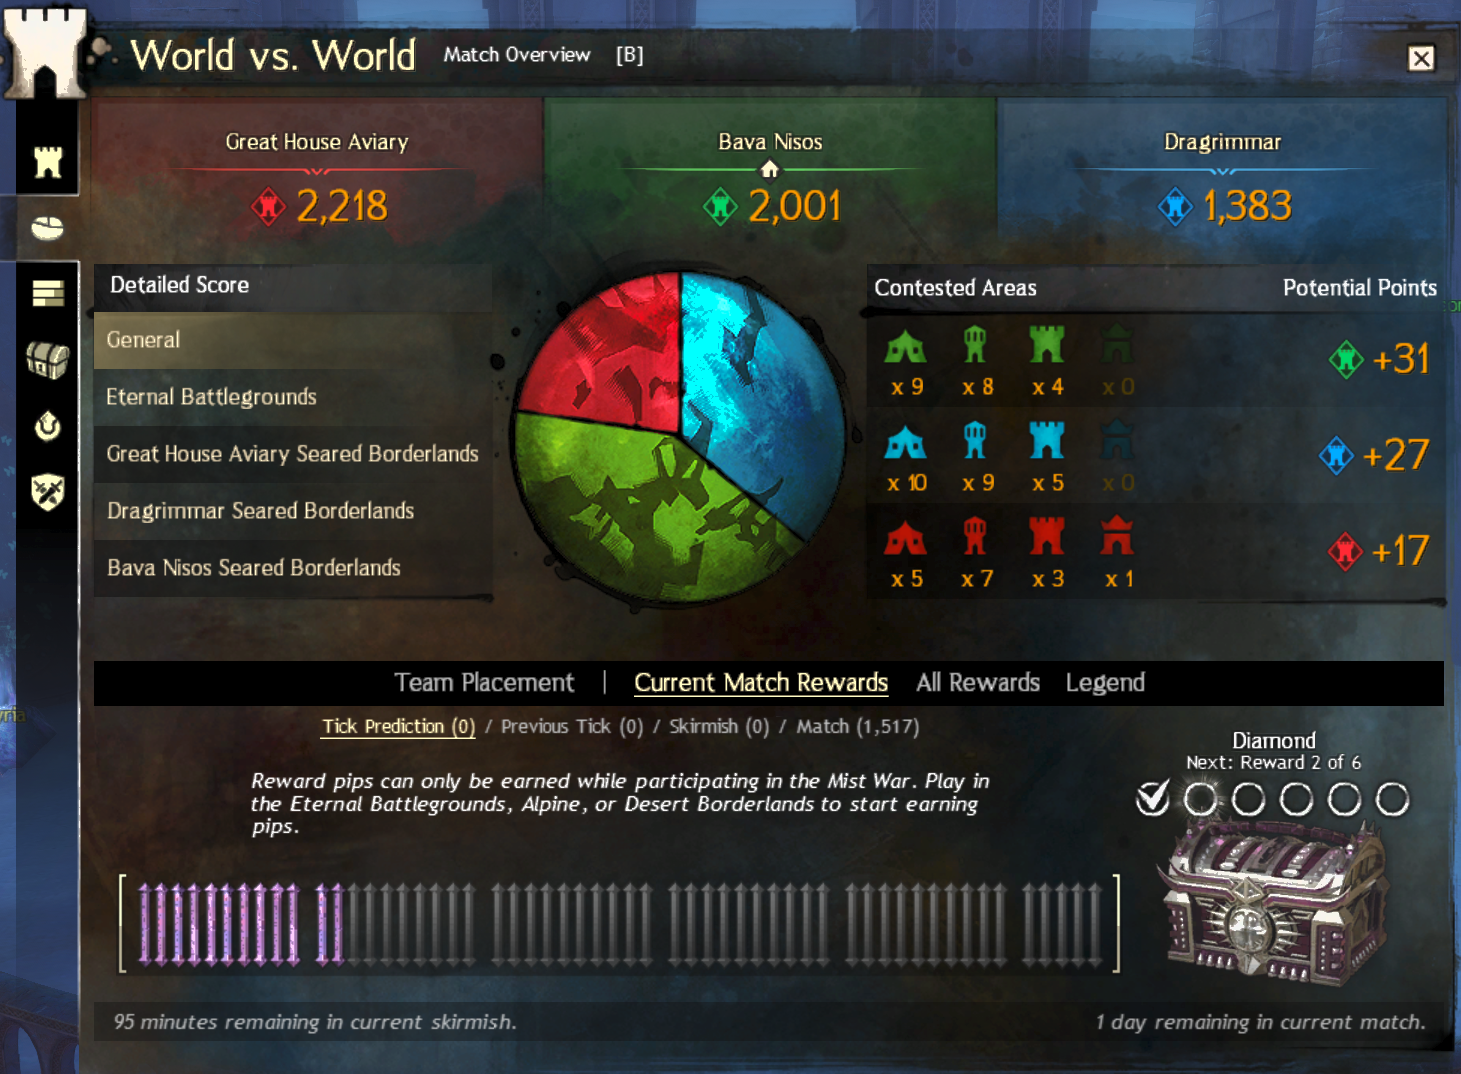
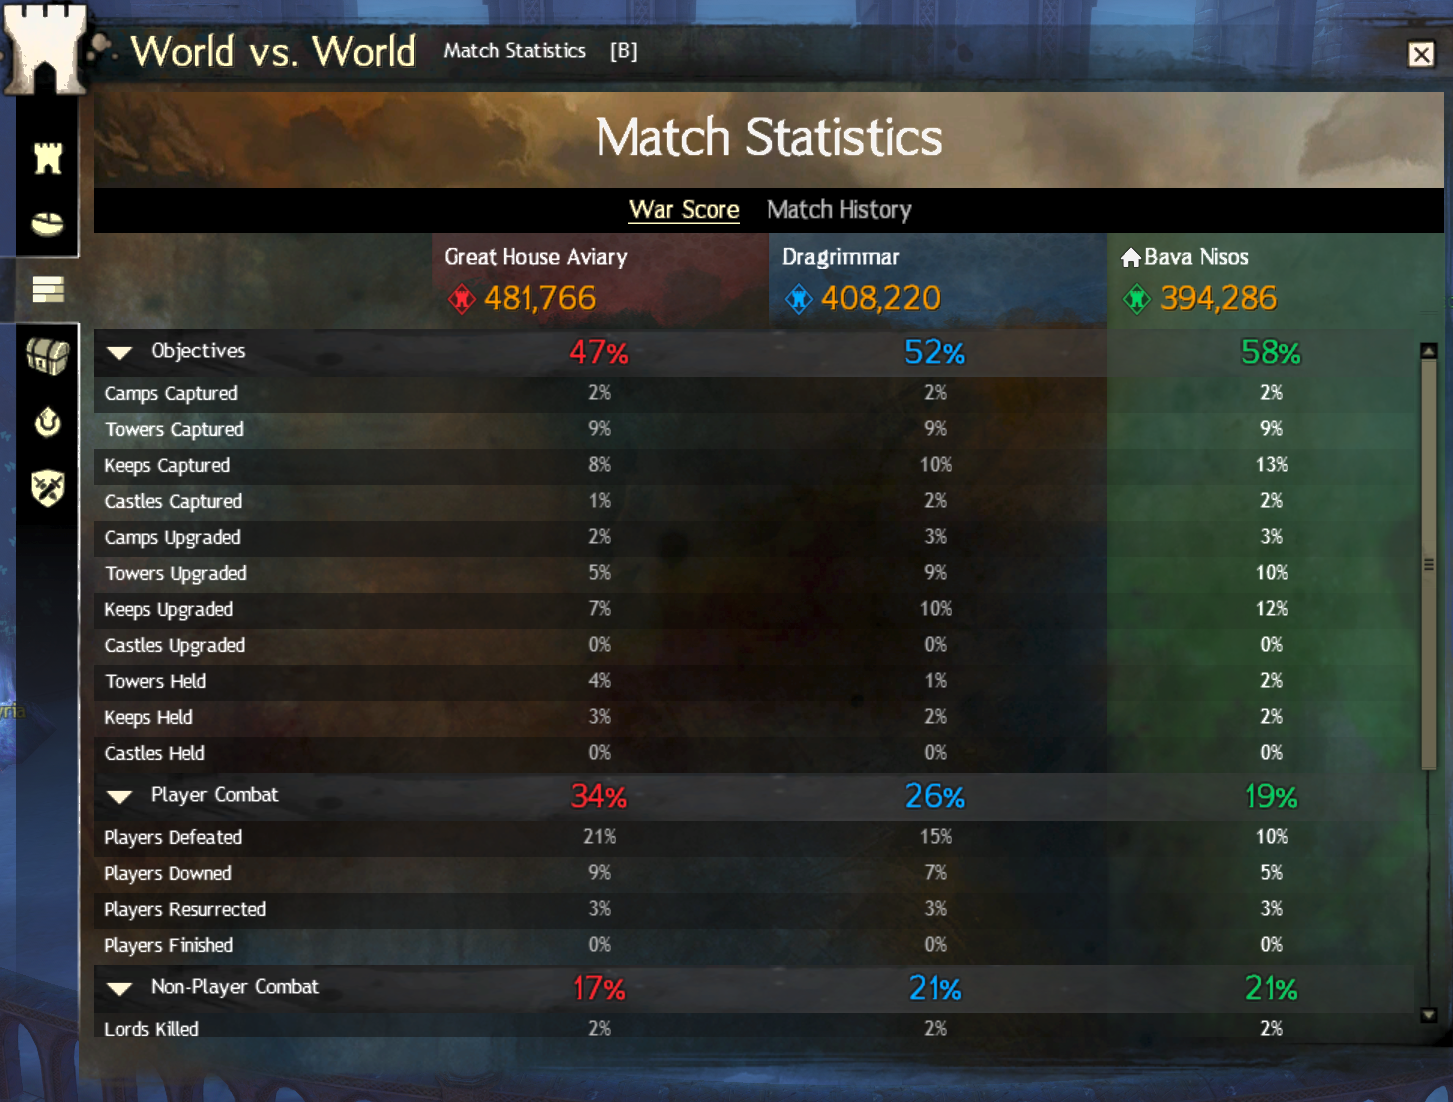
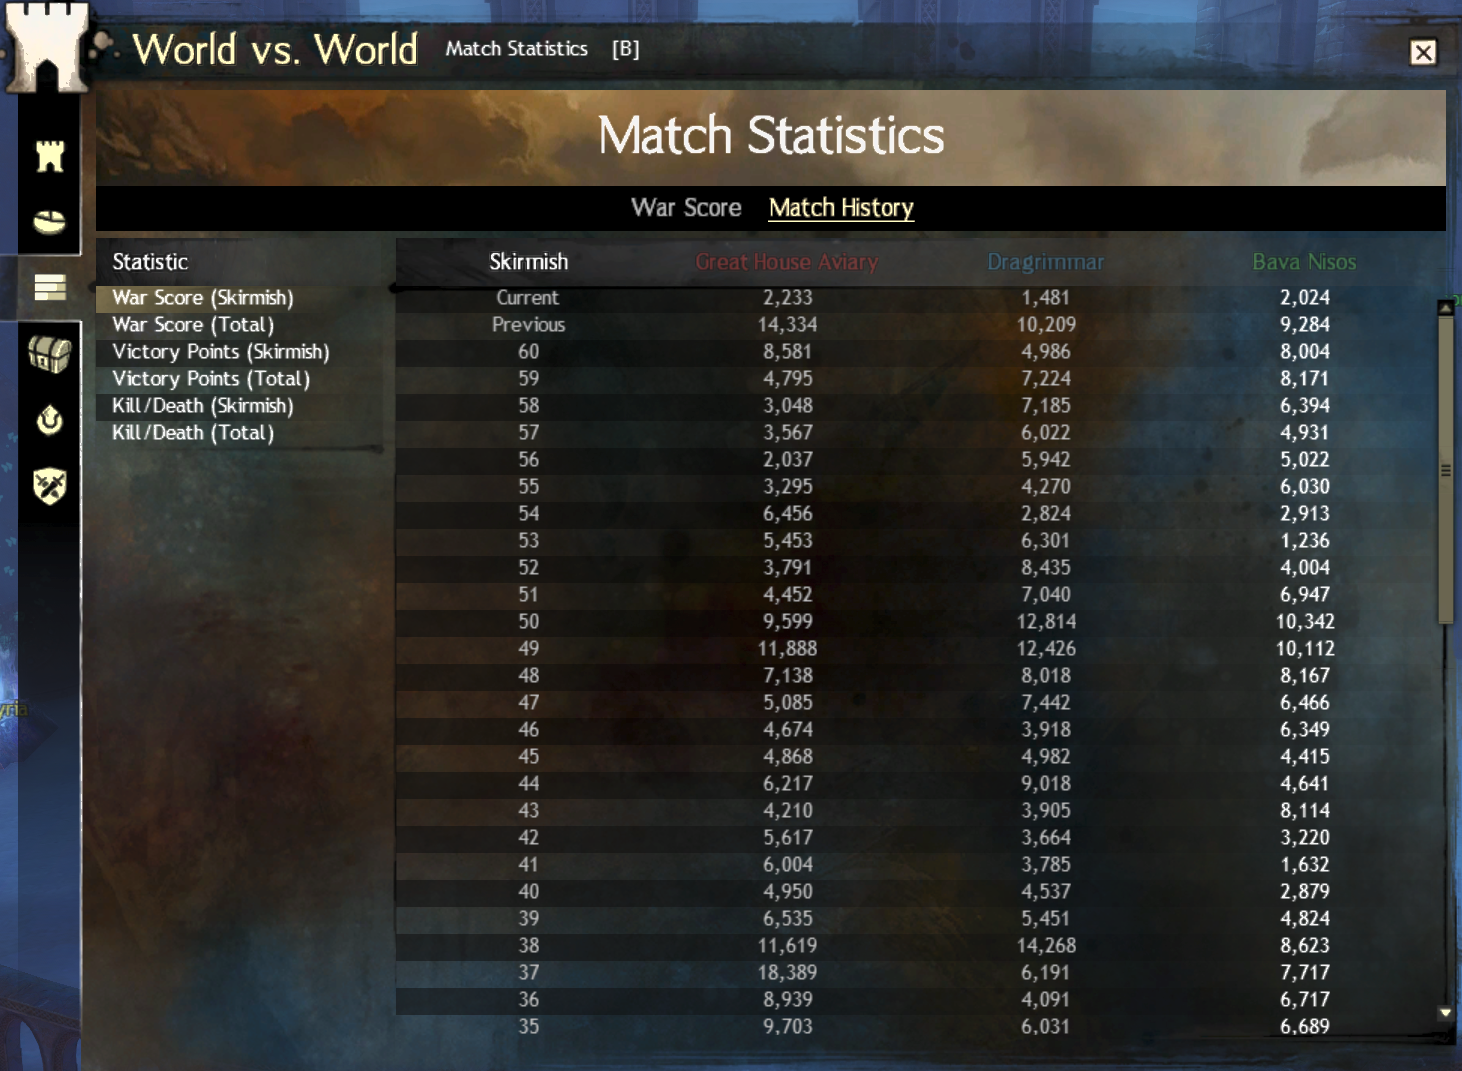
Press B or click the tower icon in the main menu to open World vs. World. The six tabs are down the left edge. Hover over an icon to read its name. For your first BLUB run, start with Matchmaking to check your team, then use Mist War to join the commander’s map.
| Tab | What you’ll see and what to use it for |
|---|---|
| Mist War | Team scores, the skirmish timer and a list of maps with join or queue controls. Pick Eternal Battlegrounds or the exact Borderland the commander calls. Ready means there is no queue. A queue number shows how many players are waiting for that map. |
| Match Overview | Compare team scores and objectives held under Detailed Score. Look under Current Match Rewards for your weekly pips and chest progress. |
| Match Statistics | Use War Score to see how each team earned its points. Use Match History to compare skirmish results and running totals. |
| Reward Tracks | A list of available, locked and completed tracks. Choose an available track and activate it to earn its rewards. Use ∞ to loop a repeatable track. See how participation affects track progress. |
| Rank and Abilities | Your World Rank, unspent World Ability Points and upgrade rows. Spend points on Warclaw, supply or siege upgrades as available. See the mastery guide. |
| Matchmaking | Your current team and the Battle Guild selected for future team creation. Players without an assignment may instead see a team-selection list. See getting onto the same team as BLUB before choosing. |
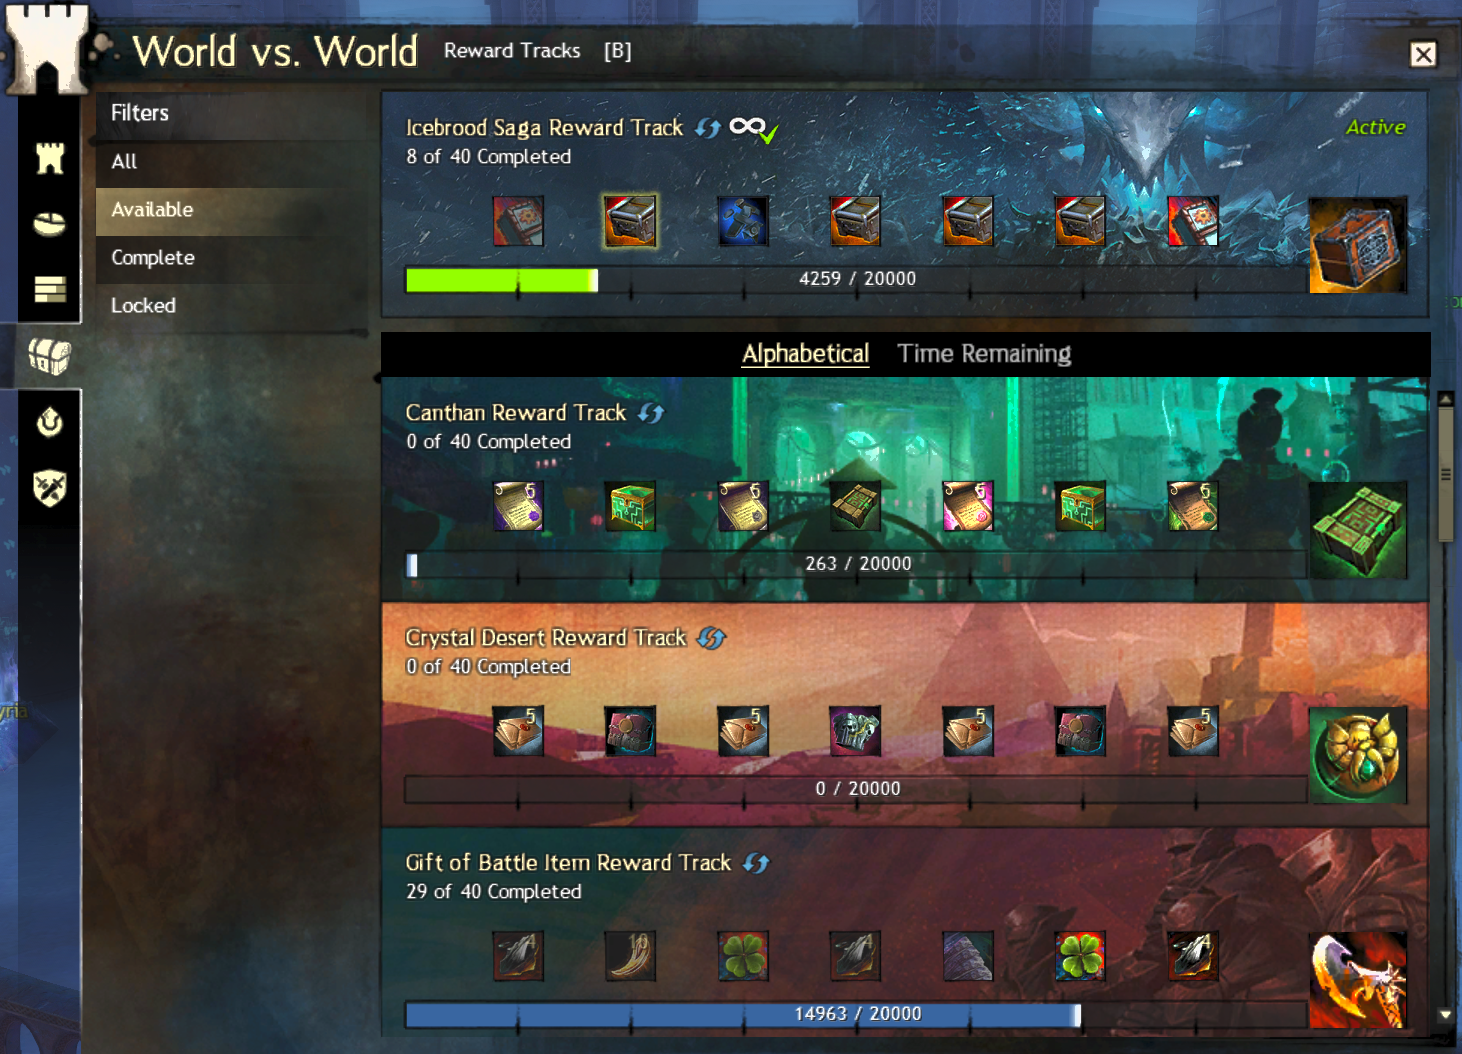
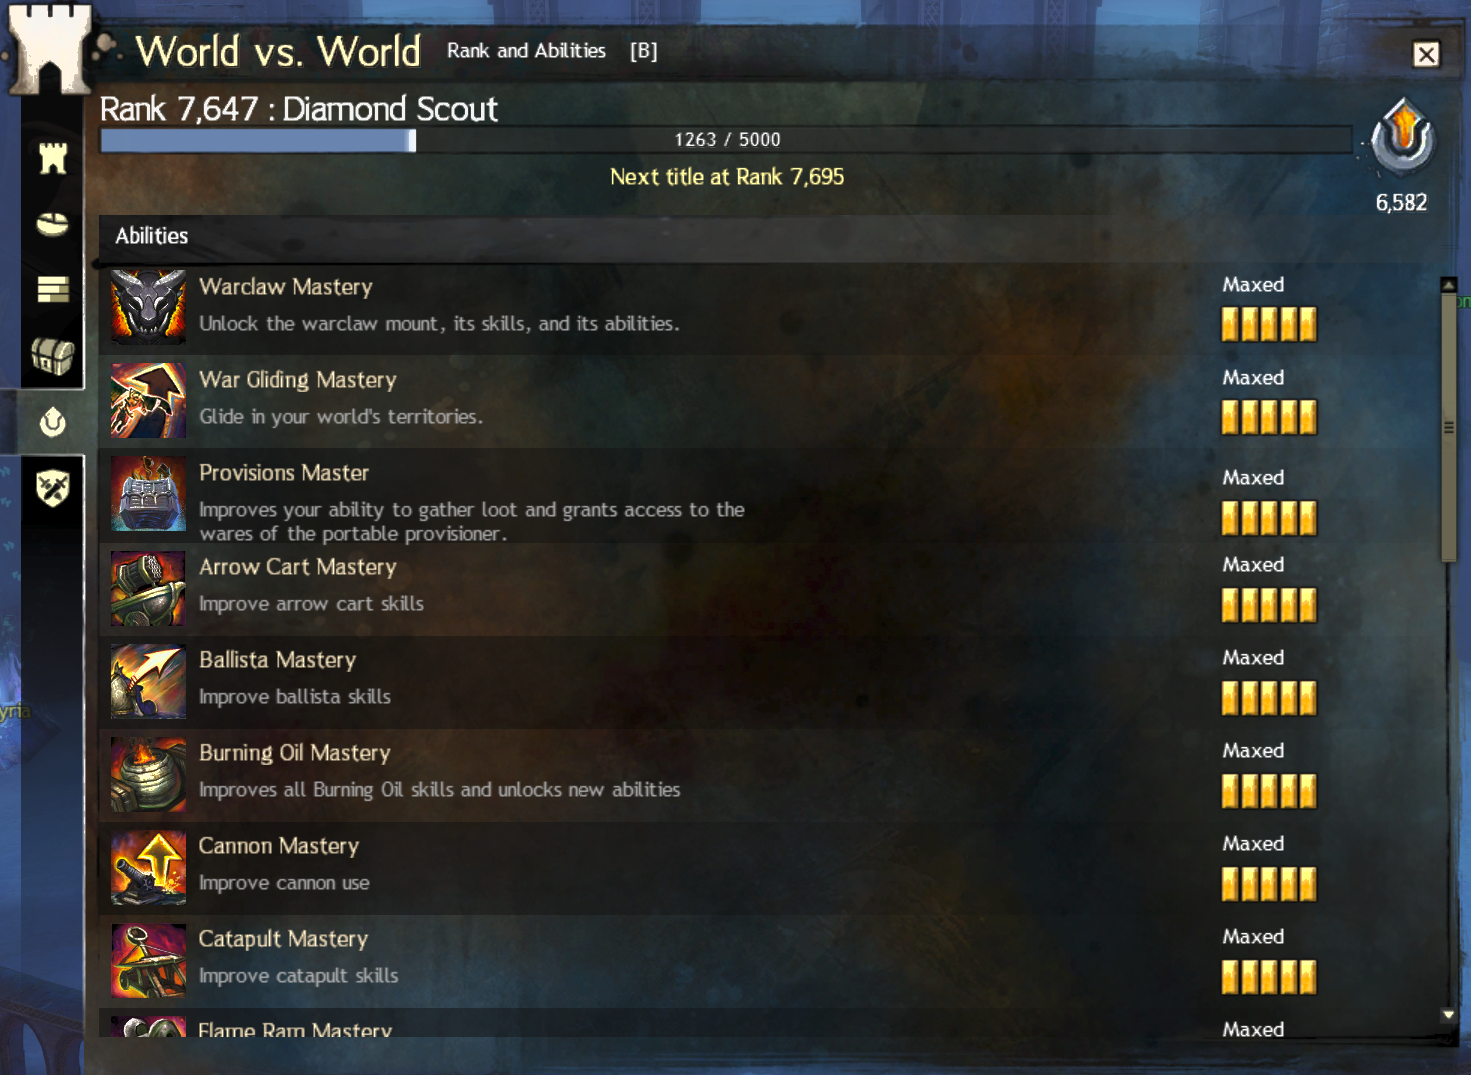
Getting onto the same team as BLUB
World Restructuring uses your selected WvW Battle Guild to group you at team creation. Your old home-world name is no longer the way to coordinate a WvW team.
- Accept the in-game guild invite, then ask which guild BLUB wants everyone to use for the upcoming team creation. Use the coordinating guild if BLUB names one.
- Open B → Matchmaking, click Select Battle Guild on the right, and confirm the guild appears under Battle guild for next season before the lockout shown at the bottom. Equipping a guild tag or representing the guild is a separate setting.
- Expect the change to take effect at the next team creation if you’re already assigned elsewhere. Weekly matchup reset and team creation are separate events. Ask in Discord if you’re unsure when you’ll be able to join.
- Already on our team? You can join an open run while you get to know us. BLUB’s public Discord lists open tags throughout the week, with no attendance or full-time representation requirement. Check Discord for the next run’s time, commander and map.
What Matchmaking is telling you
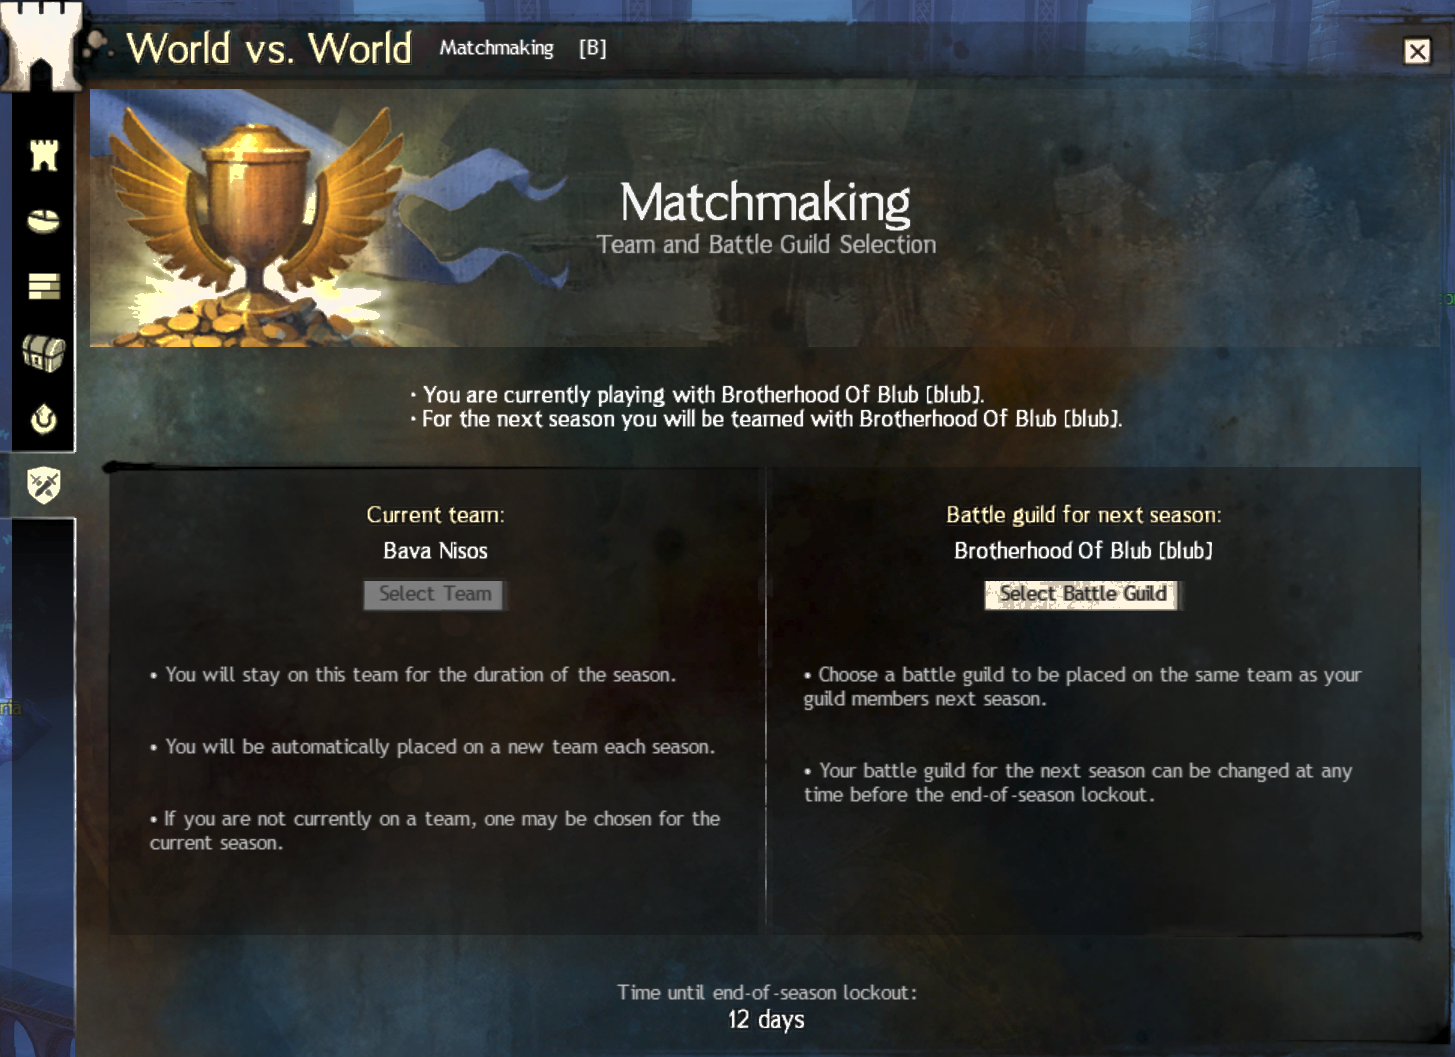
| What you see | What to do |
|---|---|
| Your team matches BLUB’s | Go back to Mist War, choose the map the commander calls and join or queue. |
| You’re assigned to a different team | Confirm which Battle Guild BLUB is using and select it before lockout. Your current assignment stays in place until team creation. After the reshuffle, check the team name with BLUB again. |
| You have no team and see a list | Ask BLUB for its exact current EU team name. If it’s available to select, highlight it and use Join Selected Team. If you can’t choose it, check with BLUB before committing to another team. See the team-selection screenshot. |

You can also set your Battle Guild from the Guild panel (G). Select the guild BLUB has told you to use and click Set as WvW Guild. Check your selection in B → Matchmaking afterwards. ArenaNet’s steps and lockout schedule.
How WvW works now
Three teams fight a week-long matchup, divided into two-hour skirmishes. War Score decides each skirmish’s placement. Placements award Victory Points, which determine the weekly result.
PPT means points per tick. Players also use it as shorthand for objective-focused play. Since the 13 November reset, the updated War Score system is live. Captures, upgrades, player combat and qualifying defensive actions contribute to the score. Periodic objective points come from Tier 3 objectives. Taking a fresh tower can still give you position and some capture score, but holding an upgraded keep, keeping its supply line open and fighting off an attack can be worth considerably more.
| Where | What you can do |
|---|---|
| Camps | Take supply, cut enemy dolyak routes or protect friendly deliveries that stock and help upgrade objectives. |
| Towers and keeps | Capture them for map control, then scout, resupply and defend. An upgraded keep can provide a useful waypoint when available. |
| Stonemist Castle | A central objective in Eternal Battlegrounds (EBG). Check which side has siege and reinforcements before committing the squad. |
November map update. The Seared Borderlands beta temporarily replaces all three Alpine and Desert Borderlands maps, with an announced end date of 8 December 2026. EBG still runs. On Seared, call the objective name and entrance or approach. If a route you remember from Alpine or Desert doesn’t exist here, it’s a different map. If Gamma says “six-seven” at the gate, someone still needs to count the rams.
Personal rewards. Pick a WvW Reward Track in the WvW panel. Eligible captures, defence and player fights build or refresh participation. The five-minute personal reward tick advances the chosen track and, from participation Tier 3, earns pips for the weekly Skirmish Reward Track on the main maps. Those pips are separate from team War Score. The November update also made placement-based skirmish and match rewards permanent. Check the WvW panel for their eligibility and progress. Repairs can help your team and award War Score in the applicable context, so check your event credit and participation separately.
Keep your rewards moving
Hover the chest above the minimap to check your participation tier and decay timer. Reward-track points start at Tier 1 and increase up to Tier 6. Weekly skirmish pips start at Tier 3 in eligible maps. If the timer is running down during a quiet stretch, check with tag before peeling off. A nearby camp capture or qualifying defence can get you back into the action. The timer has never accepted “we were waiting for Highlander’s portal” as an excuse.
For faster reward-track progress, check your guild tavern for the WvW reward-track boost. There’s also a WvW Reward Track Enrichment for an amulet with an enrichment slot. These improve reward-track points. Your skirmish pips follow their own rules. See the Snow Crows reward-track guide and the Wiki’s participation table.
Objectives and upgrade tiers
| Objective | What it does |
|---|---|
| Camp | Stocks supply and sends out dolyaks. |
| Sentry | Marks passing enemies for the team that controls it. |
| Tower | Fortified position that helps control routes and can contribute War Score. |
| Keep | Larger fortified objective with outer and inner defences. |
| Stonemist Castle | Central castle in Eternal Battlegrounds. |
| Supply caravan (dolyak) | Delivers supply and contributes to objective upgrades when it arrives. |
Fresh objectives start at T0. The upgrade tiers are T1 Secured, T2 Reinforced and T3 Fortified. Higher tiers improve defences. Escorting dolyaks helps objectives upgrade. The supply you carry is used for jobs such as building siege and repairing walls or gates.
The standard WvW maps
BLUB note Minky says Hills is open. Ask which side. Ask which map. Then check where the tag actually is.
The established four-map lineup has one shared Eternal Battlegrounds map, two Alpine Borderlands copies (Blue and Green) and one Desert Borderland (Red). Each team has its own home side on EBG and one home Borderland. The map type determines the terrain, objective names and approaches.
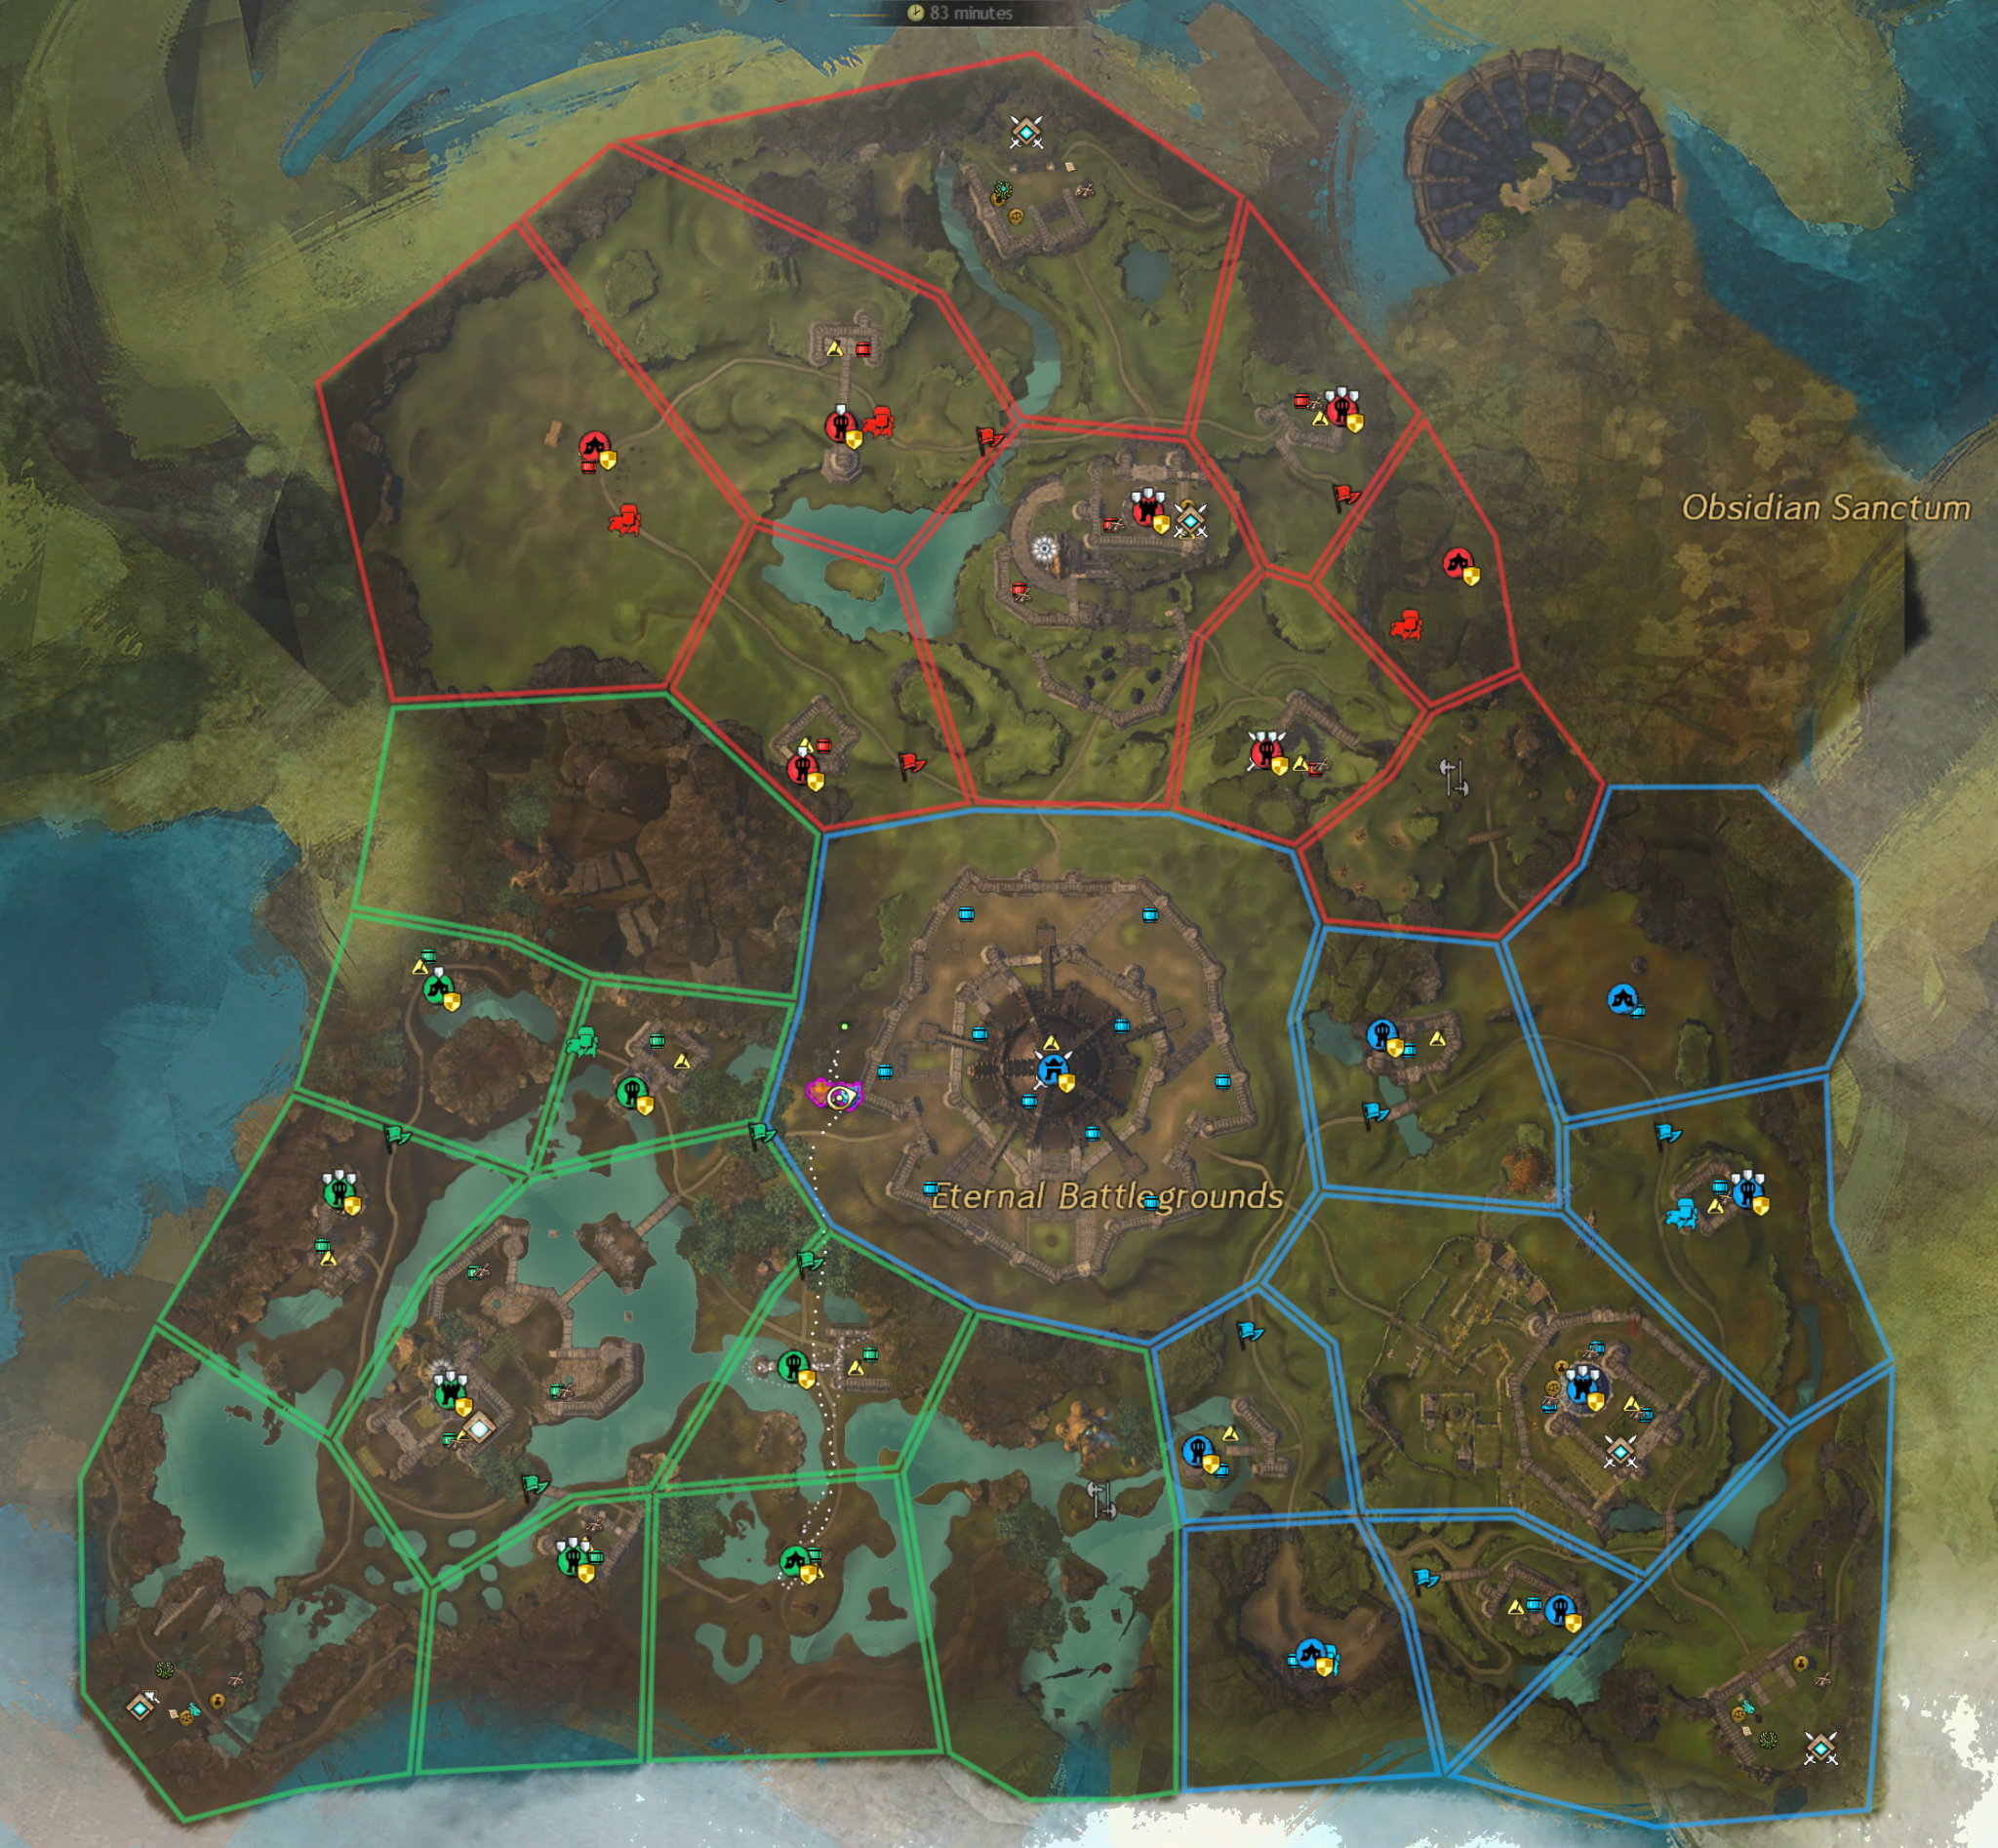
Eternal Battlegrounds (EBG)
Stonemist Castle dominates the centre. Each team has a keep and nearby towers and camps. Call the objective name and compass approach, then say outer or inner for the castle or a keep.
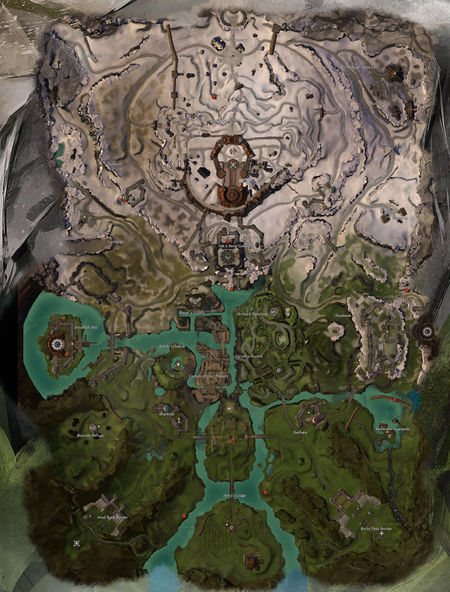
Alpine Borderlands (Blue and Green)
Both Alpine maps use the same layout. Garrison sits below the northern Citadel. Bay (Dreadfall Bay) is the western keep and Hills (Askalion Hills) is the eastern keep. The visiting teams enter from the south-west and south-east. Include Blue or Green in calls so the squad goes to the right copy.
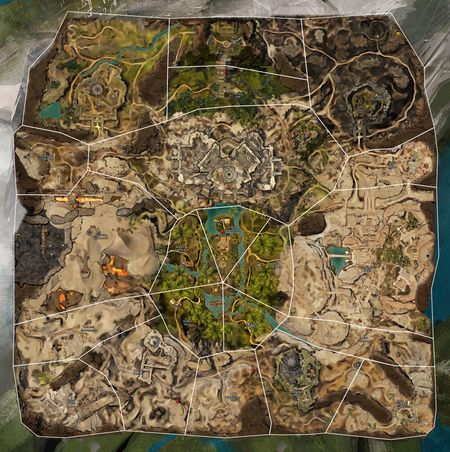
Desert Borderlands (Red)
Desert has tall cliffs, winding approaches and separate levels. Its keeps are Fire (Blistering Undercroft) in the west, Air (Osprey's Palace) in the east and Earth (Stoic Rampart) in the north. Call the side and elevation if the route is unclear.
Seared Borderlands beta
Temporary test. For the announced 10 November to 8 December 2026 test, Seared replaced all three Borderlands. EBG continued running. The standard maps above describe the established lineup outside the test. The beta map uses provisional grey-box art and layouts.
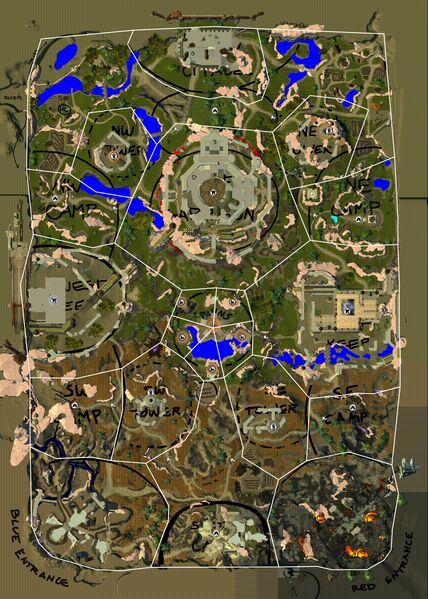
The beta is scheduled through 8 December 2026. Check which map the tag is on when you join, especially after a reset or patch. ArenaNet beta announcement
Siege and supply
BLUB note Bring supply. The ram accepts timber and metal. It remains unmoved by encouragement.
A blueprint places the build site. Carried supply finishes the weapon. Anybody on your team can help build it, even if the commander dropped it. Once it’s complete, a player mans it and gets a siege skill bar. Firing the finished weapon doesn’t spend the supply you’re carrying.
How to get and buy siege
- Buy from a Siege Master. At your WvW spawn, look for the Siege Master and open their blueprint stock. Pick the current Flame Ram Blueprint for a gate or Catapult Blueprint for a damageable wall. The Badge of Honor tab lists standard blueprints at 6 Badges of Honor each. Check the in-game price before buying a stack.
- Check your rewards and the Trading Post. Open any Siege Blueprint Cases you have from reward tracks or Skirmish Chests and choose the type you need. You can also get blueprints from WvW rank-up rewards or search the Trading Post for the exact blueprint name and compare gold prices.
- Exchange old stock. If your bank still has Basic or Superior blueprints, double-click them to exchange them or use the Siege Master’s bulk trade-in tabs. Old Guild blueprints were renamed to the current standard versions.
Keep a few rams and catapults handy if you lead small groups. If you’re following tag, ask before dropping one. Buying the blueprint gets you the build site. The squad still needs to bring enough carried supply to finish it. Blueprint sources and trade-ins.
WvW merchants at spawn
| Merchant | What to look for |
|---|---|
| Siege Master | Standard siege blueprints and bulk exchange for legacy Basic and Superior blueprints. Start here when the tag needs rams. |
| Dugan | Weekly WvW rewards and exchanges, including blueprints, Mystic Clovers and Mist-Hardened Lockbox Keys. See Dugan’s weekly stock below. |
| Skirmish Supervisor | Spend WvW Skirmish Claim Tickets on eligible WvW gear and rewards. Check the other currencies and unlock requirements on the item before buying. |
| TEID-07 Unified Vendor System | Stat-selectable exotic gear. Useful when you’re putting together your first WvW build. Check the gold and Badge of Honor cost. |
| Heroics Notary | Spend heroics currencies on expansion hero challenge unlocks. Match the unlock to the expansion you need. |
| Outfitter / Portable Provisioner | With the relevant Provisions Master unlock, buy the Permanent Portable Provisioner from an Outfitter. Its stock includes siege blueprints, with more categories as you train the ability. |
Dugan’s weekly stock
Look for Dugan in your team’s starting area on Eternal Battlegrounds or a Borderland. His offers use WvW currencies and sometimes additional materials. Most have a weekly purchase cap that resets on Monday. Check both the full cost and the remaining stock in the vendor window before confirming. His Mists Research dialogue also starts the achievement for the Mistwalker Infusion. Dugan’s locations and stock.
Find your supply
Camps generate supply. Dolyaks deliver it to nearby objectives. Interact with a friendly Supply Depot to top up, then check the supply icon in the WvW HUD for what you’re carrying. The depot stock shown in the objective information is a separate number. Use camps for routine top-ups and follow the tag’s call before drawing from a keep that’s under attack.
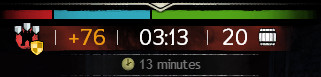
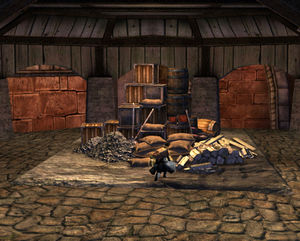
Carry limits. The default is 10. Fully trained Supply Capacity raises it to 15, a qualifying guild supply aura can add 5, and the Presence of the Keep bonus can add another 5 when applicable. Build Master lets you spend more supply per build action. It leaves the weapon’s total cost the same. The numbers below are the supply needed to finish one fresh build site.
BLUB supply audit. Commanding BLUB? Ask how much supply everyone has before you drop siege. Omegazone will have 25. So will a few others. Check again after the ram goes up and they’ll still have 25. Type /squadinfo in chat to see who’s carrying what and conduct a brief public audit. Having 25 supply is excellent. Convincing BLUB to spend it is a separate mastery.
Siege supply costs
| Equipment | Supply | Use it for |
|---|---|---|
| Flame Ram | 40 | Breaking a gate from close range. |
| Catapult | 40 | Breaking a damageable wall. Adjust charge and aim until shots hit. |
| Arrow Cart | 30 | Area pressure on players grouped at a gate, choke or build site. |
| Ballista | 30 | Targeted pressure on enemy siege or exposed players. |
| Trebuchet | 60 | Long-range pressure on structures and siege. Confirm your shots are landing before taking another one. |
| Shield Generator | 40 | Protecting a siege position from projectiles or controlling movement with force fields. |
| Siege Golem | 125 | Mobile siege for a planned push against gates. Make sure you can build and escort it. |
| Burning Oil, Cannon or Mortar | 50 each | Rebuilding destroyed fixed defensive siege at an upgraded objective. |
| Siege Disruptor | 10 | A thrown trick. Weakens most enemy siege, makes it easier to destroy and temporarily disables golems. |
Returning players may remember basic, superior and guild blueprints. The old tiers were consolidated into one standard blueprint per weapon. Arrow carts are 30 and trebuchets are 60 under the current costs.
Building and using siege
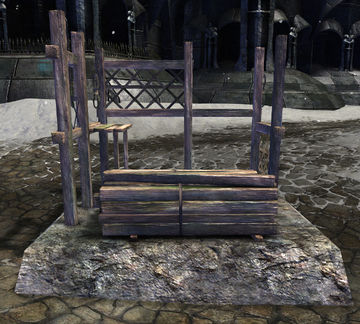
- Count before you drop. Four players carrying 10 each can finish one 40-supply ram or catapult. Two catapults need 80. Six players carrying 15 each bring 90, enough for both with 10 left. A ram plus shield generator also needs 80.
- Place for the target. A ram goes near the chosen gate. For a catapult, pick a position with a clear shot onto the called wall and some cover from enemy pressure. Check the wall actually takes damage before committing more supply.
- Build the called site. Walk up and use Interact (default F) to contribute your supply. If there’s only enough for one complete engine, finish it first. Two half-built rams are an expensive way of looking at a closed door.
- Give the weapon an operator. Let the player with the relevant siege mastery take over if one is available. Everyone else covers the build, clears enemy siege or watches likely routes for reinforcements.
- Call the breach. Say which side is open, then follow the tag through together. Keep supply for the next layer if there’s an inner gate or wall. If you’re defending, call the siege, counter it and repair when safe. Coordinate repairs so you have supply left for the next push.
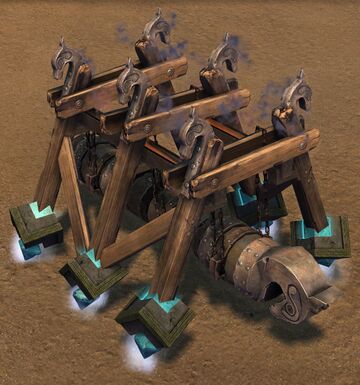
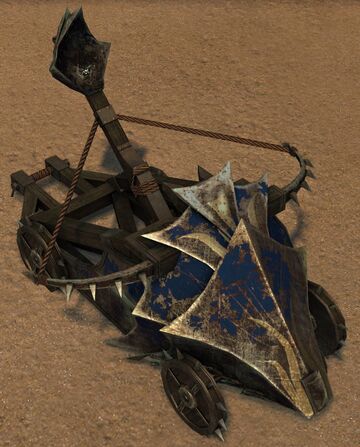
BLUB call you can use: “Two rams on north outer. Build the left one first. Save supply for inner.”
Placing a blueprint
- Pick the target first. Target the gate or wall to confirm it can take damage. Check that your group can reach the build site and protect it. For a breach, agree where the group will enter once it opens.
- Open Inventory and use the blueprint. It temporarily replaces your weapon skills. Select 1 — Deploy Siege, aim the ground target and confirm the placement. 2 — Cancel Build puts the blueprint away. If placement fails, move the marker to clear ground and try again. A failed placement keeps the blueprint bundle.
- Interact with the build site. Press F by default. Each builder contributes their own carried supply. Enemy damage to the unfinished site can increase the supply needed, so finish one engine and keep it covered.
- Man it and test the target. Let the operator with the relevant mastery take over. If the shot falls short or strikes terrain, adjust the aim or charge before anyone spends supply on a second engine.
Siege placement and skill bars
The numbers below are the operator’s skill slots on the default bar. Mastery can upgrade a skill in the same slot or add a new one. Start with the named base function and check your tooltip when the upgraded name appears.
| Siege | Where to put it | What the operator presses |
|---|---|---|
| Flame Ram · 40 | On clear ground right at a damageable gate, close enough to hit it. Give builders space. Check for burning oil overhead. | 1 Ram hits the gate. 2 Flame Blast burns nearby foes and applies Structural Vulnerability from mastery rank 2. 3 Impact Slam at rank 4 hits the gate and launches defenders. 4 Iron Will at rank 5 gives nearby allies damage reduction. |
| Catapult · 40 | Set up where you have a clear arc to the damageable wall. An angle with cover is useful if your shot clears the terrain. | 1 / 3 turn left or right. Hold and release 2 Fire Boulder to set distance. 4 switches between gravel for players or siege and boulders for structures. 5 Siege Bubble at rank 5 intercepts projectiles. |
| Arrow Cart · 30 | Set back from the edge of a wall or behind friendly cover, with line of sight onto a gate, choke or enemy build site. Check the ground target reaches the right side of the parapet. | 1 fires an area volley. 2 cripples. 3 bleeds and poisons. 4 Toxic Unveiling Volley at rank 5 reveals stealthed targets. Rotate volleys over the space where people have to stand. |
| Ballista · 30 | Find a straight firing lane to enemy siege or through an expected breach. Keep it out of melee reach where possible. | 1 Fire does extra damage to siege. 2 Shattering Bolt splinters and bleeds nearby foes. 3 Reinforced Shot pierces and deals extra siege damage. 4 Antiair Bolt at rank 1 can knock gliders down, dismount and immobilise. |
| Trebuchet · 60 | Use a protected position with a usable firing arc, usually when the target is too far away for practical catapult fire. Assign a spotter if you can’t see the impacts. | 1 / 3 turn it. Hold and release 2 to fire. 4 switches explosive and cow ammunition. Use explosives on structures. Upgraded cow shots apply healing-reducing Trebuchet Toxin. 5 Healing Oasis at rank 4 supports allies. Rank 5 explosive shots can drain objective depot supply if they hit the depot. |
| Shield Generator · 40 | Put it near the siege you’re covering, with the build site or allies in range of Force Dome. Requires Heart of Thorns to deploy and operate. | 1 Force Ball bounces and controls foes, with aegis for allies from rank 1. 2 Force Wall creates a control barrier. 3 Force Dome protects against projectiles and gives stability. At rank 5 it also protects allies inside from arrow-cart fire. |
| Siege Golem · 125 | Build somewhere protected with a walkable route to the gate and an escort ready. Avoid long drops. | Punch / Rocket Punch pressures gates, with rockets also useful against walls. Whirling Inferno damages nearby enemies. Shield Bubble blocks projectiles and gains healing at rank 3. Golem Rewiring switches melee and ranged attacks. Eject leaves the golem. |
| Burning Oil · 50 to rebuild | Fixed above an upgraded objective’s gate. Rebuild at its existing site when the position is safe enough to use. | 1 Pour Oil hits enemies directly below. At rank 4 the attack also drains enemy supply. 2 Burning Shell at rank 5 reflects projectiles. |
| Cannon · 50 to rebuild | Fixed at an upgraded objective. Use the mount with an angle on the enemy approach or siege crew. | 1 Fire for area damage. 2 Fire Grapeshot bleeds. 3 Ice Shot chills. At rank 1 the current basic-fire upgrade gives the operator damage resistance. |
| Mortar · 50 to rebuild | Fixed at an upgraded objective. Use it to counter siege from range, and ask for a spotter if the impact is out of view. | 1 / 3 turn. Charge and release 2. 4 switches explosive and incendiary ammunition. 5 Concussion Barrage at rank 5 adds knockback. |
A simple tower push. A gate push starts with a ram in range and builders covering it. A wall push starts with a catapult and someone watching the wall’s health after the first shot. If defenders start hitting the build site, clear their counter-siege or pull back and change the angle before dropping more blueprints.
Skill references Flame Ram · Catapult · Arrow Cart · Ballista · Trebuchet · Shield Generator · Siege Golem · Burning Oil · Cannon · Mortar · February balance changes
WvW mastery points
Press B → Abilities (the Rank and Abilities panel). World Rank awards one World Ability Point per rank. The points you earn are shared across the account and each character spends its own allocation. When you switch to an alt, open the panel again and check what that character has trained.
See the Rank and Abilities screenshot in the WvW panel walkthrough.
- Select the ability line, read the next rank’s tooltip and use its upgrade control. You buy ranks in order.
- When you can afford every remaining available upgrade, the panel shows Upgrade All. Use it on the character you’re setting up. The current full set totals 1,065 points with the required expansions. If the button is absent, check your unspent points and the expansion requirements before buying the tracks individually.
- To change an allocation, visit the World Ability Master in a WvW spawn area. Use an Ability Reset Guide, or the free Sample Ability Reset Guide if the vendor offers one for that character. The reset lets you reassign the character’s spent points.
| Train this first | Points | What it gives you |
|---|---|---|
| Warclaw Mastery rank 1 | 1 | Use the Warclaw in WvW with Path of Fire. |
| War Gliding Mastery rank 1 | 3 | Glide in eligible friendly WvW territory with Heart of Thorns. |
| Build Master rank 1, then rank 4 | 1 / 15 total | Spend 4, then up to 10 supply per build action. |
| Supply Master rank 4, then rank 5 | 10 / 15 total | A chance to recover spent supply, then brief protection when you deploy a site. |
| Flame Ram rank 2 or Catapult rank 1 | 10 / 3 | Structural Vulnerability on gates or more damage to walls, depending on the siege you operate. |
| Supply Capacity rank 1, then rank 5 | 5 / 145 total | Carry one extra supply at rank 1 and five extra at rank 5 before objective bonuses. |
| Repair Master rank 4 | 15 total | Spend up to 10 supply per repair action. Useful if you regularly defend. |
For an open-tag character, start with movement and Build Master, then train the siege you actually get on. For a roaming character, movement comes first. For havoc, Build Master, Supply Capacity and the group’s main breach weapon help the group complete its siege before defenders arrive. The November update moved WvW autoloot out of Provisions Master, so old guides that tell you to train it for autoloot are out of date.
Spend for the job you do most. Once you have access to the movement masteries you want, put points into supply or faster siege building if you mainly follow an open tag. If you regularly operate the equipment, look at Flame Ram or Catapult Mastery. Mostly flip camps in a small group? Guard Killer and Defence Against Guards can make those captures easier. See Snow Crows’ ability-point guide.
Pick a job
| Style | How it plays | A useful first job |
|---|---|---|
| Zerg and PPT | A larger squad moves on a commander. The tag may focus on objectives, fights or both. | Stay with your subgroup near tag, carry supply and help build the called siege. |
| Roaming | Solo or with a few friends. You choose your own routes, objectives and fights. | Flip a camp, scout the next objective and report enemy movement. |
| Cloud | Players spread around a fight and pressure from several angles, often without a tight stack. | Pick a flank near allies, pressure exposed enemies and keep a way out. |
| Havoc | A small group coordinates a specific job and moves before a larger response arrives. | Take a camp, cut the yak route and move together to the next target. |
Zerg and PPT play
How BLUB calls it. We’ll take a good fight when it serves the run. If a chase is pulling half the squad away from a keep that needs defending, expect the tag to turn back. The enemy roamer can have the scenic route to themselves.
On the move, stay close enough to pick up your subgroup’s boons and follow the same route as the tag. If you’re behind, say so once and ask where to regroup. When the commander calls stack, move onto them. On push, go with the squad. On pull back or reset, turn with the tag and save your defensive skills for the retreat.
At an objective, build the called siege first and check who’s staying to cover it. See Siege and supply for the costs and build order. Clear enemy siege or defenders when called, then stay for the capture circle after the lord falls.
In a fight, use your WvW role. Damage players aim their burst and crowd control where called. Support players stay with their subgroup and time stability, cleanses and healing around the engagement. Boon removal helps open a damage window. A downed ally can still rally or be revived. If it’s safe, help them up. If you’re fully defeated and the squad has moved on, waypoint when able and ask where to rejoin.
Example. You’re hitting a tower when a scout calls that four enemies have put rams on your upgraded home keep. Ask what the tag wants and move with the decision. A fresh tower can wait if the keep and its supply line need defending.
Roaming
Start with a camp, a route and an exit. Check the map for swords and recent capture changes, look for players before committing, and use terrain to break line of sight. If a recently flipped camp’s supervisor has Righteous Indignation, wait out the buff or move on.
- Take useful fights. Watch for enemy reinforcements. Save a stun break or movement skill so you can leave when a duel becomes a group activity.
- Work the map. Flip an exposed camp, intercept an enemy yak, escort a friendly one when upgrades matter, or watch an objective while the squad is elsewhere. Sometimes the call you make is worth more than the fight you take.
- Build for independence. Bring sustain, a stun break, condition cleanse and either mobility or reliable disengage. Use a current WvW roaming template for your profession. If you’re learning, choose a route near friendly structures and get comfortable with one matchup at a time.
Cloud play
Pick a side angle near other friendlies and keep a retreat route through terrain, towards a friendly door or back to a group. Pressure the edge of a boonball, call isolated or downed targets and help finish kills when safe. When the enemy turns towards your angle, kite away and let others pressure its flank. If everyone chases the same runner, you’ve just donated the other flank.
Bring personal sustain and mobility alongside ranged pressure, control or boon removal. When a friendly commander arrives, listen for whether they want a loose cloud around the fight or a proper stack on tag.
Havoc play
Agree on who calls the moves, what you’re taking and where you’ll meet if it goes wrong. Bring a mix of pressure, control or boon removal and some group sustain. Have someone check for reinforcements and count supply before you commit to siege.
A simple loop is flip the camp → cut the yak route → threaten the tower → leave or finish based on the response. A brief siege can pull defenders away from the main squad’s push. Tell the commander what moved and where. If a bigger group arrives early, break line of sight, regroup and choose another objective. The group’s next move matters more than finishing the exact route you planned.
Understanding squad commands
Golden rule Stay with the commander unless you’re given a separate job. Keep defensive skills ready and time your burst with the squad.
| Call | What to do |
|---|---|
| Stack | Close up on the commander so you move and receive support together. |
| Regroup / rally here | Return to the named spot and prepare for the next move. |
| Push / re-engage | Move in together on the call. |
| Bomb / spike | Place coordinated damage and crowd control on the called spot or target. |
| Veil / veil in | Move through the Mesmer’s Veil for stealth and follow the engage call. |
| Fire field / fire on tag | Place a fire combo field on the commander or at the called spot. Stack there before the push. |
| Blast fire / blast for Might | Use a skill labelled Combo Finisher: Blast so the blast lands inside the active fire field. Each successful fire blast grants 3 stacks of Might to nearby allies. |
| Water | Drop a water field at the called spot. Blast it if called and you have a blast finisher. |
| Strip / cleanse | Remove enemy boons on a strip call or allied conditions on a cleanse call. |
| Stab / dodge | Apply stability if assigned. Dodge the incoming burst or control when called. If the zerg pushes before a call comes, dodge the hit and move with the tag. |
| Backline | Pressure the enemy rear or ranged players where directed. |
| Wells | Use assigned wells on the called spot and timing. |
| Pull / pull back | Use pulls to group enemies if assigned. Pull back means retreat with the commander. |
| Res | Revive downed allies when safe. |
| Hold / don’t chase | Stay where called or stay with the tag. |
| Disengage / reset | Leave together, recover and meet where called. |
| Target | Focus the marked enemy. |
“Rally here” means regroup. In combat, rally also means returning from the downed state on a qualifying kill.
Pre-push call: “Stack on tag. Fire field here. Blast for Might.” Wait for the field before blasting, and hold other fields at that spot if the commander is calling for fire. Look for Area Might to confirm the combo. Then move with tag on the push call. Wiki: blast combos by field.
Focus targets, get downs and finish them
On a BLUB tag: follow the commander’s push, hit the same target or patch of ground, then secure the down if the squad can stay there. A down is an opening. It’s also where the enemy’s friends are about to be.
Call, take or bookmark a target
| Control | How to use it |
|---|---|
| Call Target Ctrl + T | Select the enemy first, then call it to put the shared marker over them. Your party or squad subgroup sees the call. Agree who calls in your group so a second call doesn’t replace the first halfway through a burst. |
| Take Target T | Select the latest target called for your group. Press it when the caller switches. In a large squad, listen for the commander’s location call too. Ground-targeted skills still need aiming. |
| Set / Take Personal Target | Bind both under Options → Control Options → Targeting. They’re unassigned by default. Set saves your current target for you alone. Take reselects it after you’ve switched away. Handy for keeping track of a priority enemy while following a temporary group call. |
| Alert Target Shift + T | Alerts your group about a target. Use Call Target when you want allies to pick it up with T. A commander’s squad object marker can be seen across the squad, so listen for the matching voice call. |
Turn a push into a down
- Pick something the squad can actually hit. An isolated player, someone caught at a choke, or an enemy who has just used their escape is a better call than someone already halfway to their keep. In a zerg, the commander may call a spot or a clump instead of one player.
- Stack the damage in the same window. Call the target or location, strip defensive boons such as Stability, then land crowd control and burst while they’re exposed. If the target goes invulnerable or breaks away, switch on the call or reset with tag.
- Say where the down is. “One down, left of the gate” gives everyone somewhere to aim. Then call cleave, stomp or reset so half the squad doesn’t start a different fight.
Finish the down or move with tag
- Cleave means damage the downed enemy and anyone trying to revive them in the same area. Use it when you can pressure the spot from safety. Interrupt exposed revivers if you can.
- Stomp means move close and press F (default Interact) when Finish Them!! appears. It’s a roughly 3½-second channel that movement or an interrupt can stop. One player can stomp while the others cover them. If the enemy counterpushes, move with tag.
- Watch for rallies. A downed enemy can recover through a revive or an eligible kill. In WvW, one player can rally per kill. If your own ally is down, revive them when you can safely hold the spot. A fully defeated ally generally needs an out-of-combat reviver, so follow the regroup call if the fight has moved on.
BLUB field report. “One down, left of the gate. Cleave it.” A pause. “Our left.”
Target marker examples · Default keybinds · Finishing · WvW revive and rally rules
Calls that help
BLUB note If Gamma says “six-seven”, wait for the scout to give you the actual headcount.
Map → objective → enemy number and colour → side and layer → siege and breach status → movement. Count what you can see. “About 20 red” is a useful estimate. If you’re unsure, give a range. Name the gate or wall, say whether it is outer or inner, and say open when players can pass through. If you only see part of the group, say “at least”.
| Situation | Example call |
|---|---|
| Outer under siege | EBG, Stonemist, about 20 red, north outer gate, two rams, gate 40%, falling fast. |
| Inner under siege | EBG, Stonemist, 15 green, east inner gate, one ram, gate 25%. North outer is open. |
| Wall breached | EBG, Stonemist, west outer wall open, 25 red entering through breach, moving towards inner. |
| Enemy rotating | Seared Borderlands, Westkeep, 12 blue leaving outer and heading south. |
| Uncertain count | EBG, our keep, at least 10 green at south outer, can’t see their back line, one cata firing at the wall. |
| Fight command | Stack on tag means close up for support. Stab calls for stability. Bomb on tag means commit damage, crowd control and strips together at the called spot. Peel means help your back line disengage. Reset at spawn gives everyone a regroup point. |
Use voice or /d for the squad and /m for your current map. Use /t when your team needs a cross-map alert. Ping the objective waypoint or map location when useful. Send a short update if the siege dies, the breach opens, or the group leaves. In a fight, give the urgent change and leave room for the commander.
What a squad looks like
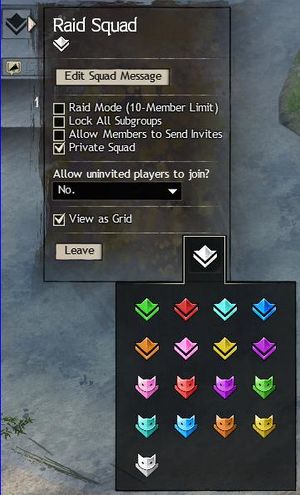
Press P to open the party or squad panel. In the grid, one tile represents a player and numbered rows represent subgroups. The commander carries the tag. The panel gives you a quick way to check your assignment and see who's with you. In an open tag, players can arrive in subgroup 1 and get sorted as roles are called. Stay in the row you're assigned. Use /d for squad chat and /p for your own subgroup.
| Example row | Player 1 | Player 2 | Player 3 | Player 4 | Player 5 |
|---|---|---|---|---|---|
| 1 | Commander / stability | Heal / cleanse | Boons / utility | DPS / strip | DPS / control |
| 2 | Stability | Heal / cleanse | Boons / utility | DPS / strip | DPS / control |
| 3 | Stability | Heal / cleanse | Boons / utility | DPS / strip | DPS / control |
A 25-player boonball can use five groups of five, with the commander occupying one of the 25 slots. Repeat this coverage as a starting point. Stay close enough to your row to receive support. Stability helps the push through crowd control. Cleanse and healing keep it moving. Boon removal and damage land together on the called target.
A 15v15 GvG can use the three rows above as its full roster. Put the shot-caller in a role they can play while calling, agree where your timed strips and burst come from, and check which players cover the first push and the reset. For 20v20, add a fourth group and check coverage again. These are example rosters. Role overlap, fight rules and the patch will affect assignments.
Example builds to look up on GW2Mists include Support Firebrand for main support and stability, Heal Druid for healing and cleanse, Support Troubadour for boon support, Power Necro for damage and strips, and Power Dragonhunter for damage. Tell the commander what role your build actually covers. Check the build date and pick the WvW version.
What to save for the push
Support: If you’re covering Stability, save it for the call or the incoming control. Coordinate the next application with the other support. If you’re covering cleanse and healing, stay within reach of your subgroup and hold a recovery skill for the reset.
Strip, control, damage: Aim boon removal at the called clump so pulls and stuns have a chance to land after Stability comes off. Follow with burst on the same spot, then pressure downed targets if the tag stays in. If the commander calls the reset, move with the group. The downed player also has friends. Ours are mostly asking which waypoint.
See Snow Crows’ guide to WvW roles for more on what supports, strip DPS and damage players bring to a fight.
Who does what
| Role | Job |
|---|---|
| Commander | Chooses routes, fights and objectives and calls pushes and retreats. |
| Support / heal | Keeps allies alive with heals, cleanses and defensive utility. |
| Boon support | Provides boons such as Might, Fury and Stability according to the build. |
| DPS / strip | Times damage with the bomb and removes enemy boons if assigned. |
| Scout | Watches objectives and enemy movement and reports numbers, colour and breach status. |
| Roamer | Moves solo or with a few allies, flips camps, picks fights and watches smaller objectives. |
Commander and Catmander tags
BLUB note The cat ears are cosmetic. You’ll still have to ask the squad to stack twice.
Standard commander tag
- Find a Commander Trainer, such as Commander Yaffa at Fort Marriner in Lion’s Arch, or Legendary Commander War Razor at a Borderland Citadel.
- Buy the Commander’s Compendium for 300 gold and 250 Badges of Honor as your first tag. Double-click the compendium to unlock commander privileges account-wide.
- Open the party or squad panel (default P), create a squad or take command of yours, then pick a tag icon and colour in the squad controls. Use private squad settings or hide the tag as appropriate for the run.
Catmander tag
Buy and consume the Catmander’s Compendium. It gives the same account-wide commander privileges and 50-player squad capacity, with cat-shaped tag options. It costs 300 gold and 250 Badges of Honor if it’s your first tag, or 150 gold and 250 Badges of Honor if you already unlocked the standard compendium.
- Blue Catmander, Alpine Borderlands. Look in the hidden area by Sunnyhill on Green Alpine or Woodhaven on Blue Alpine.
- Yellow Catmander, Red Desert Borderlands. Find the hidden room behind the waterfall west of O’del Academy in the north-west.
- Penelope the Unconquerable, Armistice Bastion. If you have access to the lounge, reach the top of its jumping puzzle. This is an alternative when Alpine and Desert are unavailable during the Seared test.
You can buy the compendium without feeding either cat. Then select your cat-shaped icon from the same squad controls.


The WvW dictionary
| Term | Meaning |
|---|---|
| WvW | World vs World |
| EBG / BL | Eternal Battlegrounds / Borderlands |
| PPT / PPK | Points per tick / points per kill |
| Zerg / blob | Large group / very large group |
| Roaming / havoc | Solo or small-group play / small organised group applying pressure |
| Tag / comm | Commander marker / commander |
| Squad / subgroup | Commander-led group / numbered party-sized row within it |
| DPS / heal / support | Damage per second or damage role / healer / role that helps the group survive |
| Boons / strips / cleanse | Positive effects / enemy boon removal / condition removal |
| Condi / power | Conditions or condition damage / shorthand for direct-damage builds |
| CC / stab | Crowd control / stability |
| Res / downed / wipe | Revive / incapacitated but revivable / group defeated |
| Bomb / spike | Concentrated damage / timed burst |
| Push / pull / kite | Advance to engage / draw enemies together / move to avoid pressure |
| Veil / gank | Mesmer stealth skill / surprise attack |
| K-train / PPT train | Quick captures with little resistance / objective-focused route for score |
| Cloud / boonball | Spread-out players fighting from several angles / tight squad built around shared support |
| GvG | Guild versus Guild |
| Reset / tail | Break off and reorganise / players trailing the main group |
| Open field | Fighting outside an objective |
| WP | Waypoint |
| AC / cata / treb | Arrow Cart / Catapult / Trebuchet |
| Ram / balli / golem | Flame Ram / Ballista / Siege Golem |
| T0 / T1 / T2 / T3 | Fresh / Secured / Reinforced / Fortified |
| SM / garri | Stonemist Castle / Garrison |
| Home / enemy | Your home Borderland or home side, depending on the call / opposing team |
| Outer / inner | First / second defensive layer of a keep or castle |
WvW etiquette
Respect the commander’s calls and your guildmates. Keep voice and chat clear during fights, share useful information and help new players find their feet. After a wipe, regroup first and talk through what would help on the next push.
WvW tools
- Snow Crows WvW has beginner guides and build templates. Match the build to the job and group size, then check the update date against the current balance patch. Use its large-scale DPS and support tier lists as references for organised zerg play.
- Blish HUD is an optional Guild Wars 2 overlay. Browse its modules for features that suit your WvW runs. Blish HUD documentation
- Raidcore Nexus is an optional addon manager with an in-game addon browser. Check each addon's description and compatibility before using it. Raidcore Nexus
Neither is required to join a BLUB run. If the commander turns left, the addon cannot turn left for you.
Being part of BLUB
Find our guild listing on GW2Mists · Brotherhood of Blub.
Say hello, tell us what you enjoy and ask someone to show you the ropes. You can start on an open tag, ask for a roaming buddy or offer to scout. If your first useful contribution is spotting two rams at the right gate, you’ve done your bit.
Keep comms clear during fights, leave route calls to the commander and be kind when someone misses a turn. Save the tactical post-mortem for the regroup. We can laugh at a wipe and still ask what would make the next push work. If you’re comfortable later, call a camp flip for a small group, help a new player find the squad, or come along for a community event.
First-night checklist: Same team. Same map. In squad. Listening. Carrying supply. Within sight of tag. Together… ish. If you can tick all six at once, tell Gamma. We’ll need him to count again.
Looking for a different kind of WvW?
We respect the fight guilds that put the time into organised squad fights and competitive play. If you’d like more of that, or you’re curious about a different playstyle, ask a BLUB officer in Discord or message one of the contacts below. Tell us what you enjoy and when you play. We can recommend guilds that might suit you and share contacts where we know them. You’re welcome to ask after an open tag. We can usually find the right person faster than we can find the right gate.
In-game contacts
- Omegazone (omegazone.9254)
- Gammazone (gammazone.3802)
- Stumpy Grumpybunny (mrstump.4568)
Join The Brotherhood of Blub [BLUB] on Discord. Find the squad’s more questionable decisions on Stumpy’s WvW Antics.
One Guild. One Community. One Brotherhood.
Thanks and references
Thanks to Gammazone and BLUB, ArenaNet and the Guild Wars 2 Wiki contributors for the in-game maps, screenshots and icons. Thanks also to GW2Mists onboarding and WvW builds, GuildJen and MetaBattle for their community guides and builds.
WvW and maps · WvW overview · EBG · Alpine · Desert · Seared beta · November patch
Siege and squad · Build sites · Siege weapons · Supply · WvW abilities · Squads
Commander tags · Commander Trainer · Catmander’s Compendium · Blue Catmander · Yellow Catmander · Penelope
Further reading · Snow Crows WvW guides · Getting started · Understanding roles · Guild Wars 2 Wiki reward tracks
A big thank-you from BLUB. To the writers, editors, build testers and screenshot wranglers behind all these guides and resources: thank you for sharing what you know. Your work helped us put this handbook together and made WvW a little easier to get into. Finding the right gate is still on us.